tanakahdaのプログラマ手帳

プログラミングとかソフトウェア開発とかの備忘録

入出力でフォルダを再帰的に操作する@Java

Files#walkFileTreeは、ディレクトリ構造を再帰的に走査する。walkFileTreeメソッドの2つ目の引数にFileVisitorインターフェースの実装をセットする。

   /**
    * 指定したディレクトリ配下をすべて削除します。
    * 
    * @param dir
    * @throws IOException
    */
    public static void deleteAll(Path dir) throws IOException {

        Files.walkFileTree(dir, new SimpleFileVisitor<Path>() {
            @Override
            public FileVisitResult visitFile(Path file, BasicFileAttributes attrs) throws IOException {
                Files.delete(file);
                return FileVisitResult.CONTINUE;
            }

            @Override
            public FileVisitResult postVisitDirectory(Path dir, IOException exc) throws IOException {
                if (exc != null) {
                    throw exc;
                }

                Files.delete(dir);
                return FileVisitResult.CONTINUE;
            }
        });
    }
   /**
    * srcディレクトリ配下をdestディレクトリへコピーします。
    * 
    * @param src コピー元
    * @param dest コピー先
    * @throws IOException
    */
    public static void copyAll(Path src, Path dest) throws IOException {

        Files.walkFileTree(src, new SimpleFileVisitor<Path>() {
                @Override
                public FileVisitResult visitFile(Path file, BasicFileAttributes attrs) throws IOException {
                    Path targetFile = dest.resolve(src.relativize(file));
                    Path parentDir = targetFile.getParent();
                    Files.createDirectories(parentDir);
                    Files.copy(file, targetFile, StandardCopyOption.REPLACE_EXISTING);
                    return FileVisitResult.CONTINUE;
                }
             }
        );
    }
javax.tools.JavaCompilerでコンパイルするときにクラスパスを指定する@Java

javax.tools.JavaCompilerでコンパイルするときに外部jarにクラスパスを通して実行する方法を調査。

javax.tools.JavaCompilerのオプションで"-cp"または"-classpath"を指定する。例えば、以下のように書くことができる。

JavaCompiler compiler = ToolProvider.getSystemJavaCompiler();
String[] options = new String[]{"-cp", "lib/mylib.jar"};
compiler.run(null, null, null, options, "MyClass.java");

これで、lib/mylib.jarに含まれるクラスをMyClass.javaで利用できる。

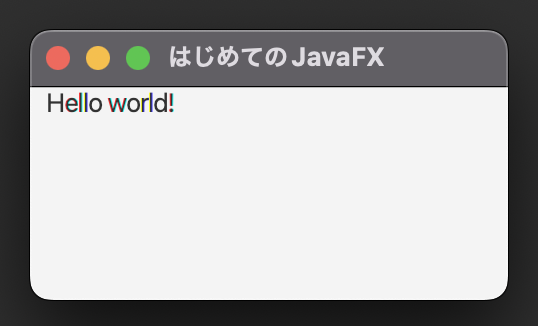
Hello JavaFX@JavaFX

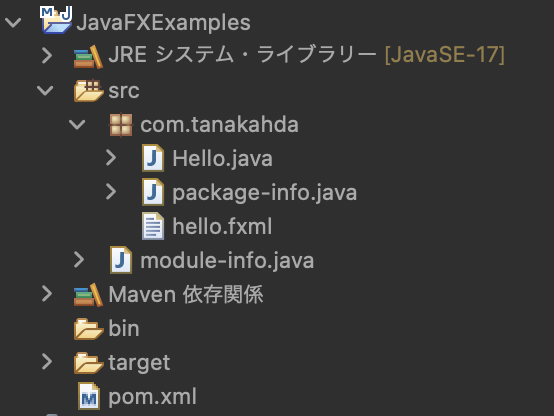
Hello.java

package com.tanakahda;

import javafx.application.Application;
import javafx.fxml.FXMLLoader;
import javafx.scene.Scene;
import javafx.scene.layout.HBox;
import javafx.stage.Stage;

public class Hello extends Application {

    @Override
    public void start(Stage primaryStage) throws Exception {
        primaryStage.setTitle("はじめてのJavaFX");
        FXMLLoader loader = new FXMLLoader(getClass().getResource("hello.fxml"));
        HBox root = loader.load();
        Scene scene = new Scene(root);
        primaryStage.setScene(scene);
        primaryStage.show();
    }

    public static void main(String[] args) {
        launch(args);
    }
}

hello.fxml

<?xml version="1.0" encoding="UTF-8"?>
<?import javafx.scene.control.*?>
<?import javafx.scene.layout.*?>

<HBox>
    <children>
        <Label text="Hello world!" prefWidth="80.0" style="-fx-alignment:center"/>
    </children>
</HBox>

module-info.java

module JavaFXExamples {
    requires transitive javafx.controls;
    requires transitive javafx.fxml;
    opens com.tanakahda;
    exports com.tanakahda;
}

pom.xml

<project xmlns="http://maven.apache.org/POM/4.0.0" xmlns:xsi="http://www.w3.org/2001/XMLSchema-instance" xsi:schemaLocation="http://maven.apache.org/POM/4.0.0 https://maven.apache.org/xsd/maven-4.0.0.xsd">
    <modelVersion>4.0.0</modelVersion>
    <groupId>JavaFXExamples</groupId>
    <artifactId>JavaFXExamples</artifactId>
    <version>0.0.1-SNAPSHOT</version>
    <build>
        <sourceDirectory>src</sourceDirectory>
        <plugins>
            <plugin>
                <artifactId>maven-compiler-plugin</artifactId>
                <version>3.8.1</version>
                <configuration>
                    <release>17</release>
                </configuration>
            </plugin>
        </plugins>
    </build>
    <dependencies>
        <dependency>
                <groupId>org.openjfx</groupId>
                <artifactId>javafx-controls</artifactId>
                <version>17</version>
        </dependency>
        <dependency>
                <groupId>org.openjfx</groupId>
                <artifactId>javafx-fxml</artifactId>
                <version>17</version>
        </dependency>
    </dependencies>
</project>

jarファイルの中身を別フォルダへ出力@Java

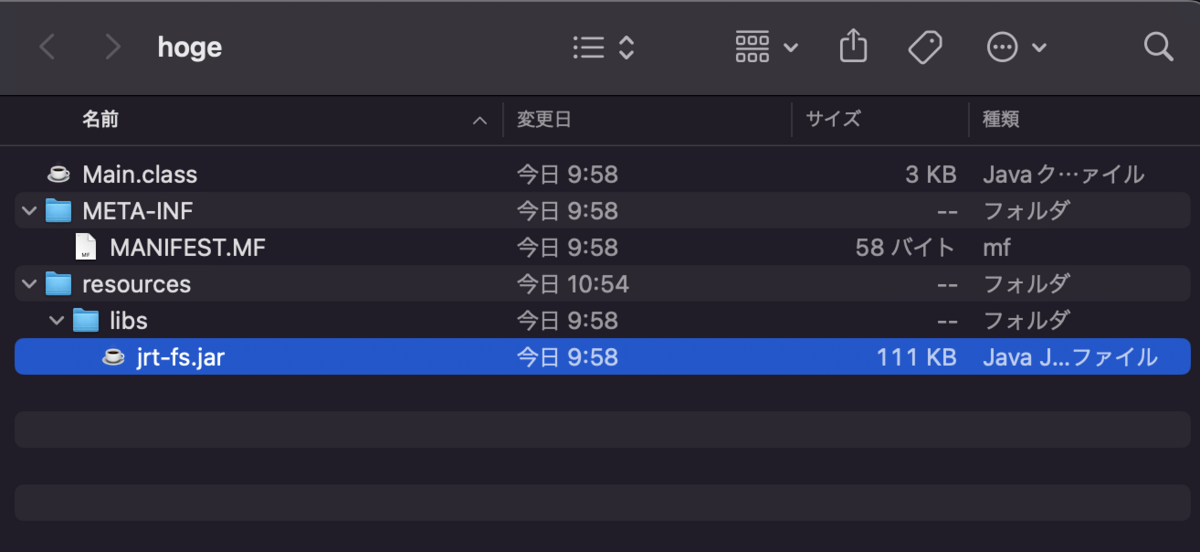
jarファイルの中身を取り出して別フォルダに出力できるかやってみたところ後述のソースコードでできた。 ChatGPT先生に教えてもらった。

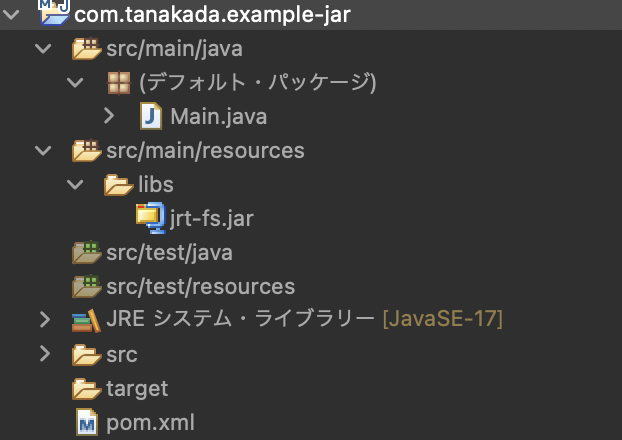
下記のプロジェクトを実行可能なjarしたあとに、実行すると自分自身の中身をhogeフォルダへ出力したい。

できた。

import java.io.File;
import java.io.FileOutputStream;
import java.io.IOException;
import java.io.InputStream;
import java.io.OutputStream;
import java.util.Enumeration;
import java.util.jar.JarEntry;
import java.util.jar.JarFile;


public class Main {

    public static void main(String[] args) {
        new Main().execute();
    }

    public void execute() {
        // jarファイルのパスを取得する
        String jarPath = this.getClass().getProtectionDomain().getCodeSource().getLocation().getPath();
        // 出力先フォルダのパスを指定する
        String outputFolder = "/Users/tanakahda/Desktop/hoge";
        // jarファイルを開く
        try (JarFile jarFile = new JarFile(jarPath)) {
            // jarファイルに含まれるエントリを列挙する
            Enumeration<JarEntry> entries = jarFile.entries();
            while (entries.hasMoreElements()) {
                // エントリを取得する
                JarEntry entry = entries.nextElement();
                // エントリの名前を取得する
                String entryName = entry.getName();
                // 出力先ファイルのパスを生成する
                String outputPath = outputFolder + File.separator + entryName;
                // 出力先ファイルの親ディレクトリを作成する
                File parentDir = new File(outputPath).getParentFile();
                if (!parentDir.exists()) {
                    parentDir.mkdirs();
                }
                // エントリがディレクトリでない場合、ファイルとして出力する
                if (!entry.isDirectory()) {
                    // 入力ストリームを開く
                    try (InputStream is = jarFile.getInputStream(entry)) {
                        // 出力ストリームを開く
                        try (OutputStream os = new FileOutputStream(outputPath)) {
                            // バイト配列を用意する
                            byte[] buffer = new byte[1024];
                            int len;
                            // 入力ストリームから読み込み、出力ストリームに書き込む
                            while ((len = is.read(buffer)) > 0) {
                                os.write(buffer, 0, len);
                            }
                        }
                    }
                }
            }
        } catch (IOException e) {
            e.printStackTrace();
        }
    }
}

ProgressMonitorで進捗率を表示する@Java Swing

package tanakahda.apps.progressmonitor;

import java.util.concurrent.TimeUnit;

import javax.swing.JFrame;
import javax.swing.ProgressMonitor;

public class Main {

    public static void main(String[] args) {

        var frame = new JFrame();
        frame.setSize(640, 480);
        frame.setVisible(true);

        // プログレスモニターを表示する
        new Thread(()->{

            ProgressMonitor pm = new ProgressMonitor(
                    frame,
                    "説明メッセージ:どの操作が監視されているかユーザーに示す",
                    "状態を説明する短いメモ",
                    0, 100);
            // 進捗モニターを表示するかどうかを決定するまでの待ち時間を設定します。
            pm.setMillisToDecideToPopup(100);
            // ポップアップが表示されるまでの時間を設定します。
            pm.setMillisToPopup(100);

            for (int i = 0; i <= 100; i++) {
                pm.setNote("進捗率 = " + i + "%");
                // プログレスバーの更新
                pm.setProgress(i);

                // プログレスモニターが可視できるように少し遅延させる
                try {
                    TimeUnit.MILLISECONDS.sleep(200);
                } catch (InterruptedException e) {
                    e.printStackTrace();
                }
            }

            pm.setNote("終了");

        }).start();
    }
}

pipで依存関係の問題を出力する@Python

pip check
spyder 5.1.5 requires pyqt5, which is not installed.
spyder 5.1.5 requires pyqtwebengine, which is not installed.
daal4py 2021.3.0 requires daal, which is not installed.
conda-repo-cli 1.0.4 requires pathlib, which is not installed.
applaunchservices 0.2.1 requires pyobjc, which is not installed.
anaconda-project 0.10.1 requires ruamel-yaml, which is not installed.
thinc-apple-ops 0.1.3 has requirement thinc<9.1.0,>=8.1.0.dev2, but you have thinc 8.0.17.
spacy-transformers 1.1.3 has requirement spacy<4.0.0,>=3.1.3, but you have spacy 3.0.0.
numba 0.54.1 has requirement numpy<1.21,>=1.17, but you have numpy 1.24.1.
ja-ginza 5.1.3 has requirement spacy<3.7.0,>=3.2.0, but you have spacy 3.0.0.
ja-ginza-electra 5.1.2 has requirement spacy<3.5.0,>=3.2.0, but you have spacy 3.0.0.
ja-core-news-lg 3.2.0 has requirement spacy<3.3.0,>=3.2.0, but you have spacy 3.0.0.
ginza 5.1.2 has requirement spacy<3.5.0,>=3.2.0, but you have spacy 3.0.0.
Note: you may need to restart the kernel to use updated packages.

Hello Next.js 13 @Next.js

アプリのテンプレートを作成

tanakahda@MacBook-Air Sample% npx create-next-app@latest

Need to install the following packages:
  create-next-app@13.4.4
Ok to proceed? (y) y
✔ What is your project named? … hello-nextjs
✔ Would you like to use TypeScript with this project? … No / Yes
✔ Would you like to use ESLint with this project? … No / Yes
✔ Would you like to use Tailwind CSS with this project? … No / Yes
✔ Would you like to use `src/` directory with this project? … No / Yes
✔ Use App Router (recommended)? … No / Yes
✔ Would you like to customize the default import alias? … No / Yes
Creating a new Next.js app in /Users/tanakahda/Desktop/next-knowleadge/hello-nextjs.

Using npm.

Initializing project with template: app-tw 

・・・
略
・・・

found 0 vulnerabilities
Initialized a git repository.

Success! Created hello-nextjs at /Users/tanakahda/Desktop/Sample/hello-nextjs

起動

(base) tanakahda@MacBook-Air hello-nextjs % npm run dev

> hello-nextjs@0.1.0 dev
> next dev

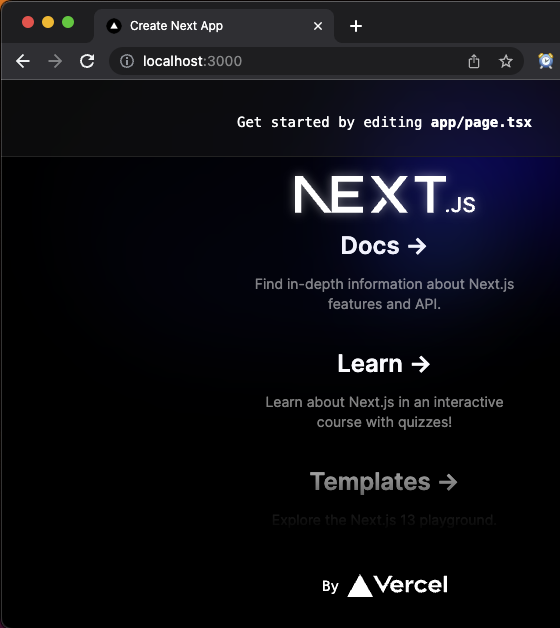
- ready started server on 0.0.0.0:3000, url: http://localhost:3000

・・・
略
・・・

- wait compiling /favicon.ico/route (client and server)...
- event compiled client and server successfully in 203 ms (612 modules)